Warm-Up Time: 11 Exercises That Will Help You Play Even Better
Here are 11 ways to get your hands and fingers ready for action, both off and on the guitar.
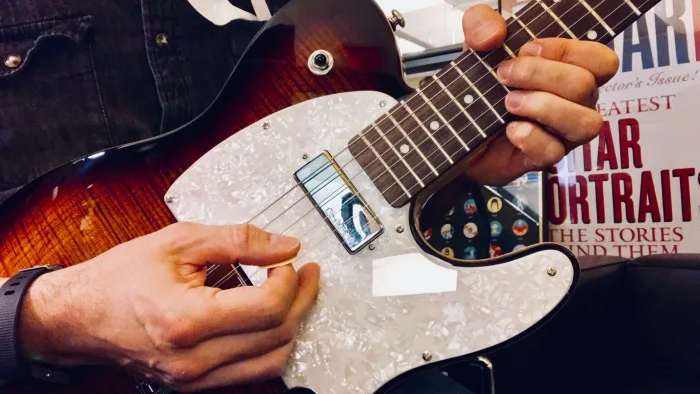
Every professional guitarist starts a session the same way: by warming up.
Whether you’re playing a gig or recital, planning a monstrous guitar practice session, or preparing to impress your friends at home with your killer chops, a precursory limbering up session is mandatory. A thorough warm-up will help bring your playing to peak level and prevent hand injuries.
Here are 11 ways to get your hands and fingers ready for action, both off and on the guitar.
GET 'EM HOT
Here’s an excellent way to get the blood circulating in your fingers and hands and make everything nice and loose.
Simply head to the nearest sink and crank up the hot water. It doesn’t have to be that hot—you don’t want to scald yourself—but it should be warm enough to get your hands loose.
While running your hands under the water, stretch out your fingers. Don’t apply any external pressure to your hands or fingers; simply stretch them out just as you do when you’re playing.
Now before “prune hands” take effect, let’s start working on the warm-up execises.
FOUR-FINGER EXERCISES
The four examples that follow are designed to loosen up all four of your fret-hand fingers as well as your picking hand.
Before you get started with the specifics of each example, there are a couple of general rules to follow for all the exercises here.
First, always start at a slow tempo to ensure that you’re playing the music correctly, and then gradually increase your tempo as you progress. Remember: it’s always better to play something slowly and correctly rather than quickly and sloppily.
Second, alternate picking (down-up-down-up, etc.) is essential for all of the single-note exercises in this workout. This technique may seem difficult at first, but you’ll develop much more speed and accuracy in the long run.
FIGURE 1 is a relatively simple starter—a pseudo-chromatic line in 5th position. We’ll use this example as our “base” pattern for the three examples that follow. Pay strict attention to the fingering, making sure to use all four fret-hand fingers (including the pinkie) for each string grouping. Once you’ve got this base pattern down, move on to its more extensive—and more challenging—offshoots.
FIGURE 1

FIGURE 2 is a “double-back” pattern reminiscent of a Charlie Parker–style bebop line. Notice how it develops independence between your first two (index and middle) fingers and your last two (ring and pinkie) fingers. To extend the exercises in FIGURE 1 or FIGURE 2, simply shift the entire pattern down one half step (one fret) at a time.
FIGURE 2

FIGURE 3 kicks things up another notch by applying the original base pattern to sequential strings (E A D G). (From a harmonic standpoint, this one probably won’t win any Prettiest Ballad awards, but remember that the goal here is to warm up your hands and fingers.)
FIGURE 3

Once you’ve completed the initial four notes, simply invert the pattern, playing in a descending fashion. This completes the motif. To get the fullest impact possible, try this one on all three sets of these four adjacent strings.
FIGURE 4 adds notes between those that compose the base pattern. An octave is added between the first two notes, a minor 6th between the second two. This example is a great dexterity builder and, again, you should move it up and down the fretboard.
FIGURE 4

Feeling loose yet?
CHORDAL WARM-UPS
Have you ever seen a show in which the lead guitarist does nothing but solo? Me neither. So obviously at some point you’ve got to be a rhythm guitarist. Since rhythm playing varies so from genre to genre, I’ve included a nice cross-section of different chord voicings that will get both of your hands active. Even if you don’t jive with the style of a certain exercise here, try it anyway. It may open some new paths in your musical evolution.
FIGURE 5 is a descending open-chord sequence in the key of C, shown here as an arpeggiated exercise (though strumming your way through is also a viable option). For the sake of variety, try transposing this chord sequence to other keys as well. For instance, this same chord sequence in the key of G major would be G–D/F#–Em–D–C–D–G.
FIGURE 5

FIGURE 6 is a great power-chord workout that doubles as a dandy barre-chord workout. Try it with the power chords first, and then extend them to full barre chords simply by adding the notes in parentheses.
FIGURE 6

FIGURE 7—a James Brown–style funk rhythm using E9 and E13 chord shapes—is a great workout for your pick hand. Work through the rhythm slowly until you perfect it, and then gradually bump up your tempo. For some tonal variety, try moving the exercise to different areas of the fretboard. For instance, if you wish to play this as a typical blues sequence, such as a I–IV–V progression, you can play the IV chord—in this case, A9—with the root on the 12th fret. The V chord, B9, is located on the 14th (or 2nd) fret.
FIGURE 7

STRING SKIPPERS
Now that your pick hand is moving, let’s kick it into high gear, this time with two devilish string-skipping exercises, each written here as a three-notes-per-string pattern in A major (A B C# D E F# G#).
FIGURE 8 is simple enough in nature. Start on the low E string with the first three notes of the scale and then skip to the D string for the next three notes. At that point, backtrack to the A string, which you skipped, and continue the pattern in the same fashion. Use alternate picking throughout, even when skipping strings. That is, start by picking the first three notes (on the low E string) in a down-up-down sequence, and then pick the first three notes on the D string in an up-down-up sequence. (Repeat this picking pattern for the skip from the A string to the G string and so forth.) Taking this approach makes for a challenging sequence, but you’ll be rewarded in the long run.
FIGURE 8

FIGURE 9 is a pivot-picking, or pedal-tone, exercise. The concept here is to return to the root of the scale between the other scale tones. This technique is used often in classical music, both in ascending and descending fashions. Each of these string-skipping figures is pattern based, so try using various scales or modes to maximize your warm-up.
FIGURE 9

THE FINAL STRETCH
FIGURE 10 uses some stacked power chords (or sus2 chords) to great effect. These chord shapes are a staple of quite a few rock classics. Thumb placement is key here. For instance, since the first chord covers a four-fret distance (the 5th fret to the 9th fret), your thumb should be centered on the back of the neck at the 7th fret. This allows you to reach back to the 5th fret and forward to the 9th without shifting your hand position.
FIGURE 10

The same can be said for FIGURE 11, which covers a whopping five-fret span. This exercise is based in A minor, and as a bonus it makes for a pretty crazy soloing line if you so choose.
FIGURE 11

That concludes our warm-up exercises. Note that we aren’t suggesting you should perform each of these guitar exercises before you play, but working through at least two or three will benefit your playing, whether you’re hitting the stage, the studio or the rehearsal room.
Get The Pick Newsletter
All the latest guitar news, interviews, lessons, reviews, deals and more, direct to your inbox!
Guitar Player is the world’s most comprehensive, trusted and insightful guitar publication for passionate guitarists and active musicians of all ages. Guitar Player magazine is published 13 times a year in print and digital formats. The magazine was established in 1967 and is the world's oldest guitar magazine. When "Guitar Player Staff" is credited as the author, it's usually because more than one author on the team has created the story.
“Write for five minutes a day. I mean, who can’t manage that?” Mike Stern's top five guitar tips include one simple fix to help you develop your personal guitar style
"It’s like you’re making a statement. And you never know where it’ll lead." Pete Thorn shares the tip that convinced Joe Satriani he was the right guitarist for the SatchVai Band


