Do Some of Your Favorite DAW Plug-Ins Lack Tempo Sync? These Useful Automation Tips Could Be the Answer
How to sync to tempo without tempo sync
Many effects parameters, especially in amp sims, have tempo sync to parameters like delay time and tremolo rate.
However, you may be using DAW plug-ins that don’t have tempo sync.
So what if you want to sync, say, EQ cutoff or resonance variations to tempo? Or use modulation waveforms that your plug-ins don’t offer?
Thanks to DAW automation, it’s often easy to create a “virtual LFO.” Some software programs (such as Steinberg Cubase, PreSonus Studio One, Avid Pro Tools and Cakewalk by BandLab) include a function to draw periodic automation envelopes, like sine, triangle, square, random and the like.
In most software, the place to look for this function is the paint or draw tool used to draw and edit automation. (Note that while not all programs allow for drawing periodic automation waveforms, with a little effort you can use a line or freehand drawing tool. You only need to get one cycle right. After that, you can just copy and paste it.)
Any waveform options will be available from a menu, for example, by right-clicking on a line tool.
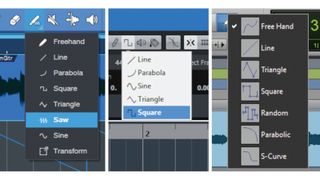
Enabling snap quantizes the waveforms you draw to the grid, thus producing rhythmic waveforms.
For example, here’s how to create tempo-synced automation in Cubase and Studio One…
Cubase
With the desired automation lane visible, click on the line tool’s drop-down menu. You’ll see options for line, parabola, sine, triangle and square.
Suppose you want a stuttering effect for the overall track volume. Click in the automation lane and draw a line. Drag it up or down to set the waveform amplitude, then drag it left or right.
Reversing direction up or down after you click reverses the waveform’s phase (e.g., the stutter can start at the top or bottom of a square wave).
You can change the duty cycle while drawing with a keyboard shortcut, as well as change the shape after drawing the envelope by using the standard draw tool to add or delete envelope nodes.
Studio One
The procedure is similar to Cubase: Open an automation lane, choose the snap value and waveform, and draw.
However, a transform feature allows you to draw a box around the automation data and skew, distort, stretch, move and otherwise shape it.
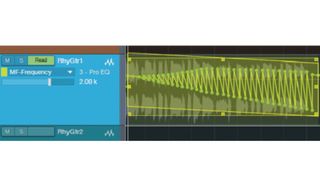
The above screenshot shows the filter frequency being automated. Note that the frequency starts out higher (and with less drastic changes) than it is later in the clip.
Cakewalk by BandLab also works similarly – select tool, select grid, click and drag – but it has its own special feature where, as you drag the drawing tool higher or lower, the overall automation level changes in real time. You don’t need to change this after the fact.
Finally, one of my favorite automation options doesn’t sync to tempo or even need a specialized tool: You can use a basic drawing tool to create random waves that vary parameters slowly over time.
Between that and periodic waveforms, your bases are covered.
Get The Pick Newsletter
All the latest guitar news, interviews, lessons, reviews, deals and more, direct to your inbox!

"It’s like you’re making a statement. And you never know where it’ll lead." Pete Thorn shares the tip that convinced Joe Satriani he was the right guitarist for the SatchVai Band

"This is something you could actually improvise with!" Add vibrant rhythms and sophisticated chords to your guitar playing with Jesse Cook’s five essential flamenco techniques
