Legato Workout - One-Hour to Fluid Performance
This one-hour legato workout will be the cure for what ails even the most hardcore alternate pickers.
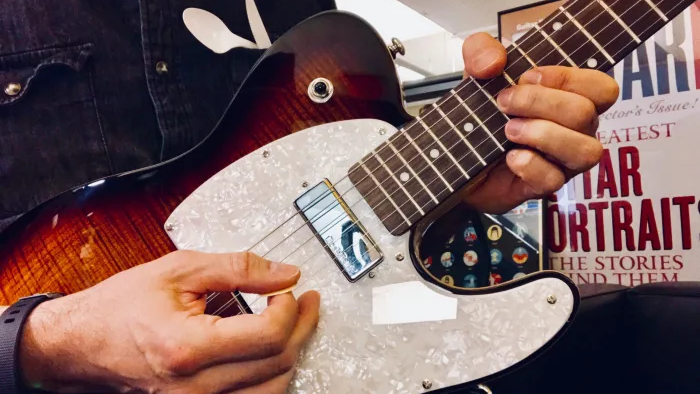
Looking to add some fluidity to your single-note lines? This one-hour legato workout will be the cure for what ails even the most hardcore alternate pickers.
As any seasoned player will tell you, it’s ideal to have a full arsenal of techniques at your disposal. And legato playing is a big one - just ask Steve Vai, Joe Satriani and Eddie Van Halen. In fact, that list of names alone should make you want to start woodshedding your legato chops, which in turn will endow your fret hand with newfound strength.
Hammer-Ons
The basic purpose of legato playing is to create smooth flowing lines. Perhaps the most common legato techniques are hammer-ons and pull-offs. Both are indicated (in both standard notation and tablature) with a slur or arc, above the affected notes
FIGURE 1A, based on the E natural minor scale (E F# G A B C D), climbs an octave with two-note hammer-ons. To execute each hammer-on, strike the first note with your pick while aligning your “hammer” finger directly over the target fret. Then, without repicking, fret the second note with a hammering motion. It takes a decent amount of velocity to get the hammered-on note to sound as loud as the picked one, so slam the second finger down aggressively.
The A minor pentatonic scale (A C D E G) drives the two-note hammer-on pairs of FIGURE 1B. This is a cool way to add legato to blues-based lines.
FIGURES 1A-B

Pull-Offs
A pull-off is the opposite of a hammer-on. To execute a pull-off, begin by fretting both notes simultaneously. (The only exception would be when pulling off to an open string.) Pick the first note and then “flick” it off the neck at a downward angle, thus sounding the lower note. Don’t overdo the pull-off motion - think “down, then out” to avoid open-string noise.
FIGURE 2A employs the same notes as FIGURE 1A but features a pull-off pattern. The same goes for FIGURE 2B in which the A minor pentatonic scale is treated to a series of descending pull-offs that end on the root, A.
FIGURES 2A-B

FIGURES 3A–B contain back-to-back hammer-ons and pull-offs. For each three-note group, start with a hammer-on. Leave your initial fret-hand finger depressed and then pull the hammer finger off to re-sound the initial pitch. For continuity’s sake, both figures use the same melodic materials as FIGURES 1–2.
FIGURE 3A is inspired by the intro run in Aerosmith’s classic “Dream On.” When playing through it, use your index finger to fret the initial note of each slur. When the subsequent note is two frets away (e.g. from the 10th to the 12th fret) use your 3rd finger on the higher note; when it’s only one fret away (7th to 8th fret) use your 2nd finger.
FIGURE 3B gives you another legato option for the pentatonic scale. To execute these slurs, anchor your fret hand in 5th position and use your 1st finger to sound the 5th-fret notes. Depress the 8th-fret notes with your 4th finger and the 7th-fret notes with your 3rd finger. The exercise is capped off with a slurred slide - a move in which the second note isn’t picked - that resolves on the root of the scale. Here, use your 1st finger to fret the G, and then slide your finger evenly up the neck two frets to sound the A.
FIGURES 3A-B

Guitarists tend to gravitate toward comfortable, if not necessarily efficient, fingerings when first learning the instrument FIGURE 4 is an excellent strength-training exercise for your fret hand, since it touches on all potential weak areas in your fingering repertoire. The numbers below the tab staff indicate the proper fingering for each slur grouping. This lick will help build strength in any fret-hand muscle groups that have been ignored.
FIGURE 4

Trilling and Tapping
Now let’s work up some other, more complex legato techniques. A trill is a rapid repeating sequence of hammer-ons and pull-offs (usually in a 16th-note pattern) played over a fixed amount of time. FIGURE 5 contains a descending quarter-note trill sequence influenced by early Scorpions axman Uli Jon Roth. Take the figure slowly at first, picking the first note of each trill while making sure to acclimate your fret hand to the various position shifts involved.
FIGURE 5

The blistering guitar work of Eddie Van Halen is loaded with finger tapping. FIGURE 6A begins with a tap at the 12th fret, followed by a pull-off to the 5th fret and a hammer-on to the 8th, all in one fluid motion.
FIGURE 6B contains the same notes but played entirely with pull-offs. To execute each tap, simply hammer on the “T” note with a pick-hand finger - preferably the middle finger, so you can still hold your pick - while depressing the fret-hand note that follows. Then, lift your tap finger in either an up- or a down-then-out fashion - whichever feels more comfortable - to sound the next note. Start slowly, making sure all the notes rhythmic durations are the same. As your comfort level increases, bump up the tempo until you reach your desired speed.
FIGURES 6A-B

Like Van Halen’s “Eruption,” FIGURE 7 contains a sequence of taps and pull-offs - here, in B minor. The pick hand finger provides much of the melodic movement here - first on a measure-by-measure basis (measures 1–2) and then on a beat-by-beat basis (measures 3-4).
FIGURE 7

Lose The Pick!
Picks? We don’t need no stinkin’ picks! This final segment will help you develop an all-legato approach in the styles of Vai and Satriani.
FIGURE 8A depicts a run down the A major scale (A B C# D E F# G#). Take note of the half slur, or “hammer-on-from nowhere,” prior to the 2nd-string sequence. This articulation is key to smoothly transitioning from string to string without the use of a pick, Using your 4th finger, hammer directly onto the 10th fret to sound the A note while readying your 3rd and 1st fingers for the next two notes (G# and F#) of the pull-off sequence. Each subsequent string’s notes are played in the same manner.
FIGURE 8A

FIGURE 8B similarly depicts an ascending pattern derived from the E natural minor scale. Practice each of these figures slowly at first, making sure each note is articulated cleanly and with sufficient dynamic control. If you’re having problems with open-string noise, try dampening the strings with your pick hand (which you’re not using here). Reach across your guitar’s body and lay your pick hand’s palm over the strings (behind the lick you’re playing), preferably on the first couple of frets.
FIGURE 8B

Once you’ve got a handle on single-position legato runs, try some position shifting. FIGURE 9 weaves through the G major scale (G A B C D E F#) using four positions, which are connected by slides. After completing the initial 8th-position flurry, use your 1st finger to execute the slide at the tail end of the slur. This will set you up to play the next note grouping in 7th position. Repeat this process when shifting to the 4th and 2nd positions. This is a good way to employ your legato chops horizontally and thus make use of the entire fretboard.
FIGURE 9

Well end our one-hour workout with a pentatonic tap lick in A minor, as shown in FIGURE 10. Reminiscent of Van Halen’s solo break in “Hot for Teacher,” this line combines most of the techniques covered in this workout: hammer-ons, pull-offs, tapping and even half slurs. Once you’ve got this lick mastered, try adding some finger taps to three-notes-per-string patterns to build four-notes-per-string lines.
FIGURE 10

Get The Pick Newsletter
All the latest guitar news, interviews, lessons, reviews, deals and more, direct to your inbox!
Guitar Player is the world’s most comprehensive, trusted and insightful guitar publication for passionate guitarists and active musicians of all ages. Guitar Player magazine is published 13 times a year in print and digital formats. The magazine was established in 1967 and is the world's oldest guitar magazine. When "Guitar Player Staff" is credited as the author, it's usually because more than one author on the team has created the story.
“Write for five minutes a day. I mean, who can’t manage that?” Mike Stern's top five guitar tips include one simple fix to help you develop your personal guitar style
"It’s like you’re making a statement. And you never know where it’ll lead." Pete Thorn shares the tip that convinced Joe Satriani he was the right guitarist for the SatchVai Band

